Brooklyn Blackout Cake Recipe
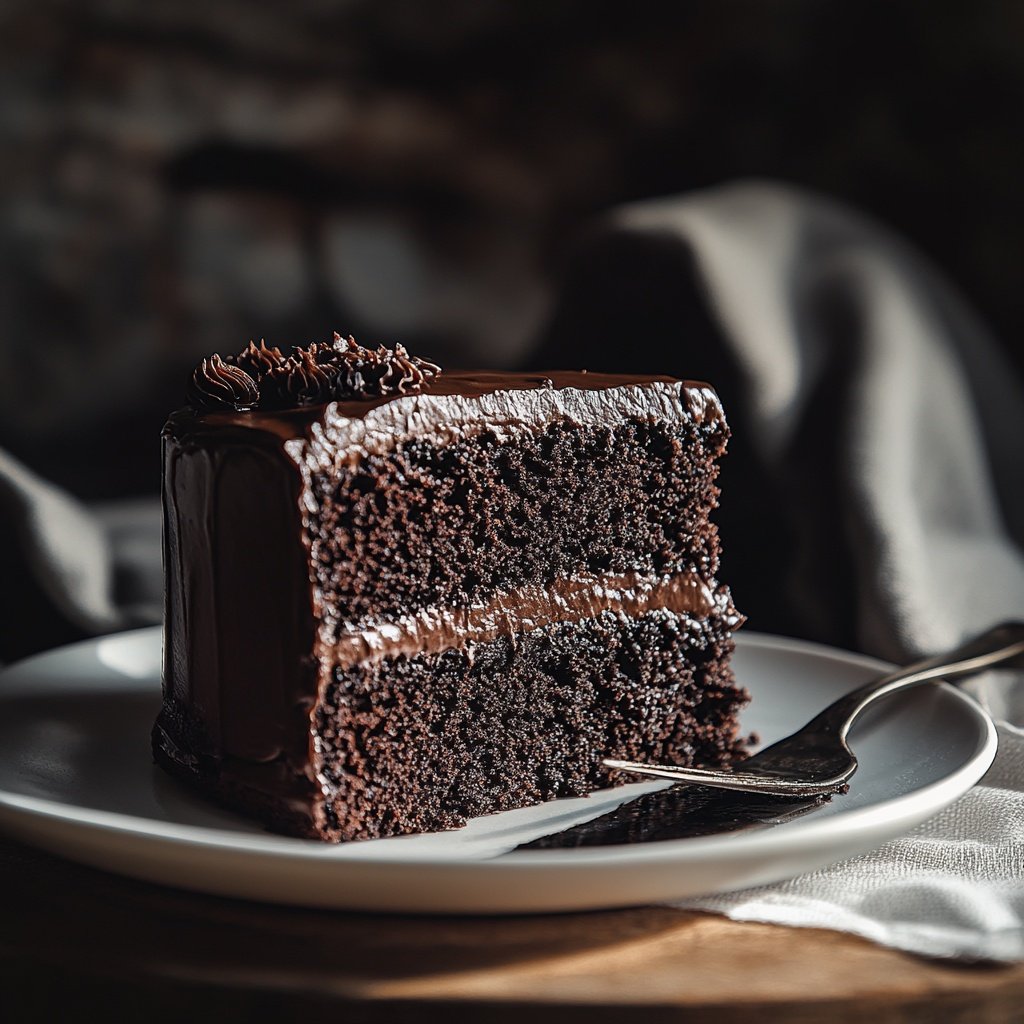
Brooklyn Blackout Cake stands as one of the most indulgent desserts in American baking. Known for its ultra-moist chocolate layers, luscious chocolate pudding filling, and signature crumb coating, this cake is a celebration of deep, dark chocolate.
Whether you’re baking for a celebration or simply satisfying a chocolate craving, mastering this recipe will add a show-stopping dessert to your repertoire.
This version provides a step-by-step approach, clear measurements, troubleshooting, and variations to guarantee a perfect result for every skill level.
Ingredients Checklist
Start with quality ingredients for the richest flavor and most reliable results. This checklist includes precise amounts, plus essential notes for substitutions and enhancements.
Chocolate Cake
-
2 cups (250g) all-purpose flour
-
1¾ cups (350g) granulated sugar
-
¾ cup (65g) Dutch-processed cocoa powder (deepens color and flavor)
-
2 tsp baking powder
-
1 tsp baking soda
-
¾ tsp salt
-
½ cup (120ml) vegetable oil or melted unsalted butter
-
2 large eggs, at room temperature
-
1 cup (240ml) buttermilk, at room temperature (for extra tenderness)
-
1 cup (240ml) hot strong coffee or hot water (intensifies chocolate flavor)
-
1 tbsp pure vanilla extract
Chocolate Pudding Filling
-
⅔ cup (130g) granulated sugar
-
¼ cup (30g) Dutch-processed cocoa powder
-
3 tbsp (22g) cornstarch
-
¼ tsp fine sea salt
-
2 cups (480ml) whole milk
-
4 large egg yolks
-
4 oz (115g) semisweet or bittersweet chocolate, finely chopped
-
2 tbsp (30g) unsalted butter
-
1 tsp pure vanilla extract
Chocolate Frosting
-
1 cup (225g) unsalted butter, softened
-
3 cups (375g) powdered sugar, sifted
-
¾ cup (65g) Dutch-processed cocoa powder
-
½ tsp salt
-
1 tsp vanilla extract
-
4–6 tbsp (60–90ml) whole milk or heavy cream
For Assembly
-
Extra cake crumbs (from trimmed cake layers)
-
Optional: chocolate shavings for garnish
Tools Needed
-
Three 8-inch (20cm) round cake pans (or two 9-inch)
-
Electric mixer
-
Saucepan and whisk
-
Parchment paper
-
Cooling rack
-
Offset spatula
-
Serrated knife or cake leveler
-
Fine mesh sieve

Step-by-Step Instructions
Follow these detailed steps for best results. Each stage is essential for flavor and texture—don’t skip the tips for professional-level cake!
1. Make the Chocolate Pudding Filling
Start with the pudding, as it must cool before assembly. In a saucepan, whisk together sugar, cocoa, cornstarch, and salt. Gradually whisk in milk until smooth, then add egg yolks. Cook over medium heat, whisking constantly, until the mixture bubbles and thickens (about 4–6 minutes). Remove from heat; add chocolate, butter, and vanilla. Whisk until glossy. Press plastic wrap directly onto the surface to prevent a skin and chill until set (at least 2 hours).
2. Prepare and Bake the Cake Layers
Preheat oven to 350°F (175°C). Grease and line cake pans with parchment.
In a large bowl, sift together flour, sugar, cocoa powder, baking powder, baking soda, and salt. In a separate bowl, whisk oil, eggs, buttermilk, vanilla, and hot coffee. Pour wet into dry ingredients and whisk until just combined—batter will be thin.
Divide batter evenly among pans. Bake 22–28 minutes (8-inch pans) or until a toothpick comes out with moist crumbs. Cool 10 minutes, then turn out onto racks and cool completely.
3. Make the Chocolate Frosting
In a large bowl, beat butter until creamy. Gradually add sifted powdered sugar and cocoa, mixing on low. Add salt, vanilla, and enough milk for a smooth, spreadable texture. Beat on high until fluffy (about 2 minutes).

4. Prepare the Cake Crumbs
Level the tops of the cakes with a serrated knife, reserving trimmings. Pulse the scraps in a food processor or crumble finely by hand for the crumb coating.
5. Assemble the Cake
Place the first cake layer on a serving plate. Spread half the pudding over the top, then repeat with the second layer. Top with the final cake layer. Apply a thin layer of frosting over the entire cake (crumb coat). Chill for 15 minutes. Frost the cake completely with remaining frosting.
6. Finish with the Signature Crumb Coat
Press cake crumbs onto the sides and top of the frosted cake, covering completely for the classic blackout look. Press gently so the crumbs adhere well.
7. Chill and Slice
Refrigerate at least 1 hour for clean slices and best flavor melding. Serve at room temperature.
Tips for Perfect Results
For an authentic blackout cake experience, keep these tips in mind:
-
Use Dutch-processed cocoa for a darker, less acidic cake.
-
Buttermilk keeps the crumb moist and tender—don’t substitute with regular milk unless adding 1 tbsp vinegar or lemon juice per cup.
-
Hot coffee intensifies the chocolate without adding coffee flavor.
-
Whisk pudding constantly to avoid lumps; strain if needed for ultimate smoothness.
-
Always chill pudding and cake layers before assembly for easy stacking.
-
Use a digital scale for accurate flour and cocoa measurements.
-
A crumb coat prevents loose crumbs from marring the final frosting layer.
-
For gluten-free cake, substitute a reliable all-purpose gluten-free blend.

Serving Suggestions
Make your blackout cake stand out with thoughtful presentation and accompaniments:
-
Serve with a dollop of lightly sweetened whipped cream or crème fraîche.
-
Add fresh berries for a bright flavor contrast.
-
Pair with cold brew, espresso, or even a glass of red wine.
-
For extra decadence, drizzle slices with warm chocolate sauce.
-
Slice with a hot, dry knife for neat portions.
Final Thoughts
Brooklyn Blackout Cake is more than just a chocolate cake—it’s an iconic dessert with layers of texture, depth, and nostalgia.
By following this step-by-step guide, you’ll achieve a deeply moist crumb, a rich pudding center, and a signature crumb coat for a bakery-quality finish.
With troubleshooting and creative ideas, this recipe adapts to any skill level or occasion. Whether it’s your first try or your fiftieth, this blackout cake delivers chocolate perfection in every bite.

Sabrina Khan Tisha is the creative force behind Dessert Diary, a recipe blog celebrating desserts, cakes, cupcakes, muffins, and sweet treats. With a passion for baking, she shares simple, delicious recipes and tips to inspire home bakers everywhere.