Best Chocolate Candy Bar Cake Recipe
Chocolate candy bar cake is a dream come true for anyone who loves combining classic cake with the irresistible flavors of favorite candy bars.
This cake isn’t just about piling sweets on a chocolate base—it’s about striking the right balance of rich, moist crumb and satisfying candy crunch.
With careful selection of ingredients, tips for superior texture, and creative garnish options, this cake stands out at birthdays, parties, or any gathering.
Below you’ll find a complete, detail-rich recipe that goes beyond the basics, filling in the common gaps found in standard candy bar cake write-ups.
Ingredients Checklist
A great cake starts with precise ingredients and proper preparation. Here’s a thorough list with a few extra options for customizing your candy bar cake.
For the Chocolate Cake:
-
2 cups (250g) all-purpose flour, spooned and leveled
-
2 cups (400g) granulated sugar
-
¾ cup (65g) unsweetened cocoa powder (Dutch-process preferred for deep flavor)
-
2 teaspoons baking powder
-
1½ teaspoons baking soda
-
1 teaspoon fine salt
-
1 cup (240ml) whole milk, at room temperature
-
½ cup (120ml) vegetable oil (or melted coconut oil for a subtle twist)
-
2 large eggs, at room temperature
-
2 teaspoons vanilla extract
-
1 cup (240ml) hot coffee or boiling water (enhances chocolate flavor)

For the Chocolate Frosting:
-
1 cup (226g) unsalted butter, softened
-
3½ cups (420g) powdered sugar, sifted
-
½ cup (45g) unsweetened cocoa powder
-
½ cup (120ml) heavy cream or whole milk (plus extra if needed)
-
2 teaspoons vanilla extract
-
Pinch of salt
Candy Bar Layer and Garnish:
-
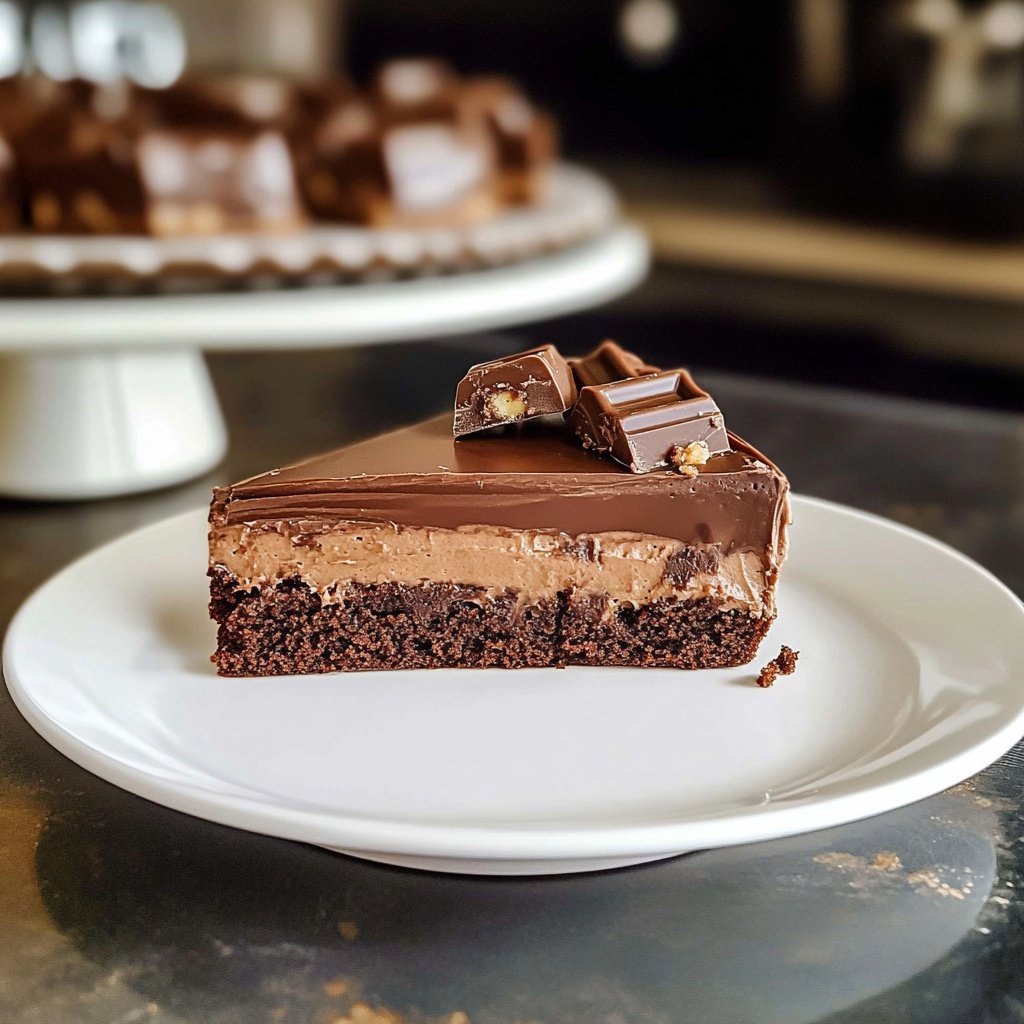
1½ cups (about 8oz/225g) assorted chocolate candy bars, chopped (Snickers, Kit Kat, Twix, Reese’s, Milky Way, etc.)
-
Additional chopped candy bars or mini bars, for topping
-
Optional: chocolate chips, peanut butter cups, or caramel-filled candies for added flavor
Extra Garnishes (optional):
-
Chocolate shavings or curls
-
Caramel drizzle or chocolate sauce
-
Toasted nuts (for crunch and balance)
-
Fresh berries or mint sprigs for color contrast
Equipment:
-
Two 8 or 9-inch round cake pans
-
Parchment paper
-
Electric mixer (hand or stand)
-
Mixing bowls
-
Whisk and spatula
-
Cooling racks
-
Offset spatula for frosting
-
Serrated knife for leveling cakes
-
Cake turntable (optional but helpful for frosting)
Step-by-Step Instructions
Follow these steps for a candy bar cake with perfect layers, structure, and flavor. Each detail helps you avoid the common pitfalls of dense cake or soggy candy layers.
1. Prep the Pans and Ingredients
Preheat your oven to 350°F (175°C). Grease two cake pans, line bottoms with parchment, and dust sides lightly with cocoa powder. Bring all refrigerated ingredients to room temperature for even mixing.
2. Combine Dry Ingredients
In a large bowl, whisk together flour, sugar, cocoa powder, baking powder, baking soda, and salt. Sifting dry ingredients ensures a light crumb.
3. Mix Wet Ingredients
In a separate bowl, beat eggs, milk, oil, and vanilla until smooth. For extra chocolate depth, add a teaspoon of espresso powder.
4. Blend and Add Coffee
Gradually combine the wet and dry mixtures. Once mostly combined, carefully stir in hot coffee or boiling water. The batter will be thin—this yields a tender, moist cake.
5. Bake the Cakes
Divide batter evenly between pans. Bake for 28–33 minutes, rotating pans halfway through for even rise. Cakes are done when a toothpick comes out with a few moist crumbs (not wet batter).
6. Cool and Level
Let cakes cool in pans 10 minutes, then turn onto wire racks and remove parchment. Cool completely. For clean layers, trim the domed tops with a serrated knife.
7. Make the Frosting
Beat softened butter on medium speed until creamy, 2–3 minutes. Add cocoa powder, half the sugar, salt, and half the cream; beat to combine. Gradually add remaining sugar and cream, then vanilla. Beat until fluffy, adding more cream if needed for spreading consistency.
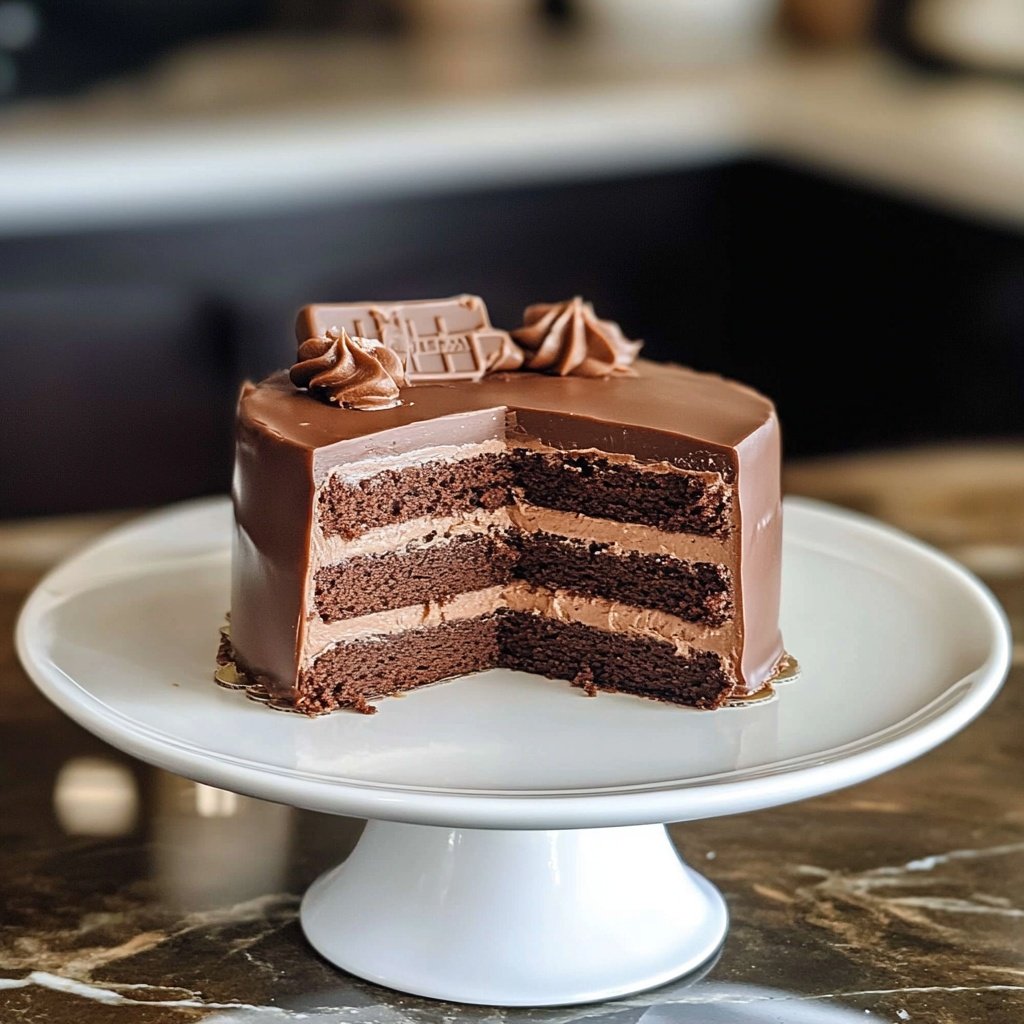
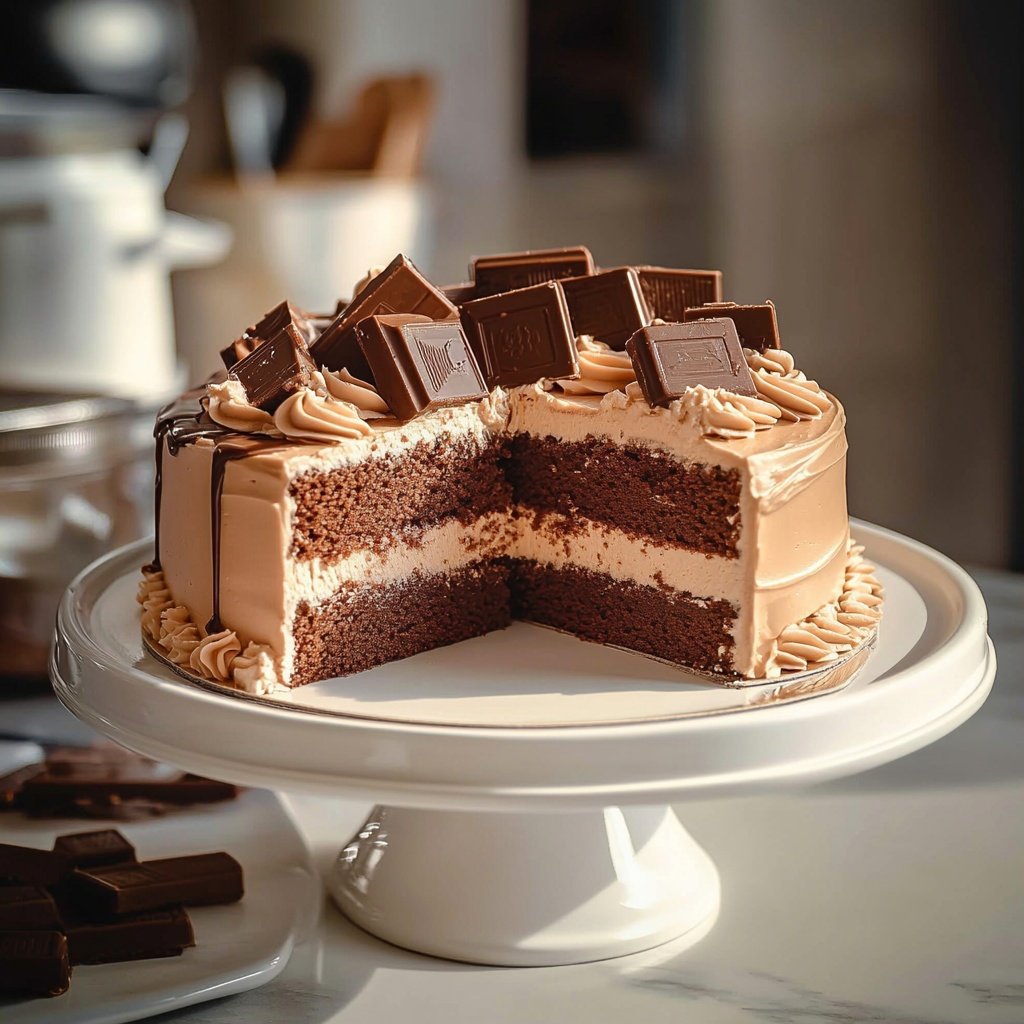
8. Assemble the Cake
Place one cake layer on your serving plate or turntable. Spread a thick layer of frosting, then scatter half of the chopped candy bars evenly over the frosting, pressing lightly so they adhere. Place the second cake layer on top and repeat with a thin layer of frosting (the crumb coat). Chill for 20 minutes.
9. Final Frosting and Decoration
Frost the entire cake smoothly, then press remaining chopped candy bars into the top and sides. For extra flair, add chocolate curls, caramel drizzle, or a handful of mini candies.
Tips for Perfect Results
Small tweaks make a big difference in the final cake. Here are essential tips for superior texture and balanced sweetness.
-
Don’t Overmix: Stir just until the batter is combined. Overmixing can make cake tough.
-
Room Temperature Ingredients: Ensure eggs and dairy are at room temp for even blending and maximum rise.
-
Use Quality Cocoa: The better the cocoa, the richer the flavor.
-
Chop Candy Evenly: Uniform candy pieces help distribute flavor and prevent large pockets of melted candy.
-
Candy Layer Placement: To avoid soggy or overly chewy layers, sandwich chopped candy between frosting—not directly between cake layers.
-
Chill for Stability: If frosting becomes too soft, chill the cake briefly before adding the final coat or decorations.
-
Balance the Sweetness: Mix in a pinch of salt or use bittersweet chocolate if the candy bars are especially sweet.
Serving Suggestions
A few creative touches can turn this cake from impressive to unforgettable. Here are ways to serve it that highlight its textures and flavors.
-
Warmed Slices: Briefly microwave a slice for an extra gooey, melty bite.
-
Serve with Ice Cream: Vanilla, coffee, or caramel ice cream pairs well with the rich chocolate and candy bits.
-
Drizzle with Extra Sauce: Top each slice with chocolate or caramel sauce for bakery-style decadence.
-
Slice with a Hot Knife: For clean, neat portions, dip your knife in hot water and wipe dry between cuts.
-
Garnish Fresh: Add berries, whipped cream, or a fresh mint sprig to balance the richness.
Final Thoughts
A chocolate candy bar cake isn’t just a recipe; it’s a chance to get creative and use up leftover treats or highlight your favorite brands. The secret to an unforgettable cake lies in balanced layers, moist crumb, and thoughtful use of candy—never letting the mix-ins overwhelm the cake’s structure. This guide goes beyond the basics, providing extra pointers on ingredient prep, candy placement, and storage that competitors often overlook. Whether for a birthday, potluck, or a simple weeknight celebration, this cake is guaranteed to draw smiles and second helpings. Happy baking!

Sabrina Khan Tisha is the creative force behind Dessert Diary, a recipe blog celebrating desserts, cakes, cupcakes, muffins, and sweet treats. With a passion for baking, she shares simple, delicious recipes and tips to inspire home bakers everywhere.