Chocolate Hazelnut Cheesecake Recipe
Chocolate Hazelnut Cheesecake is the ultimate dessert for anyone who loves rich, nutty, and creamy flavors together in one show-stopping bite.
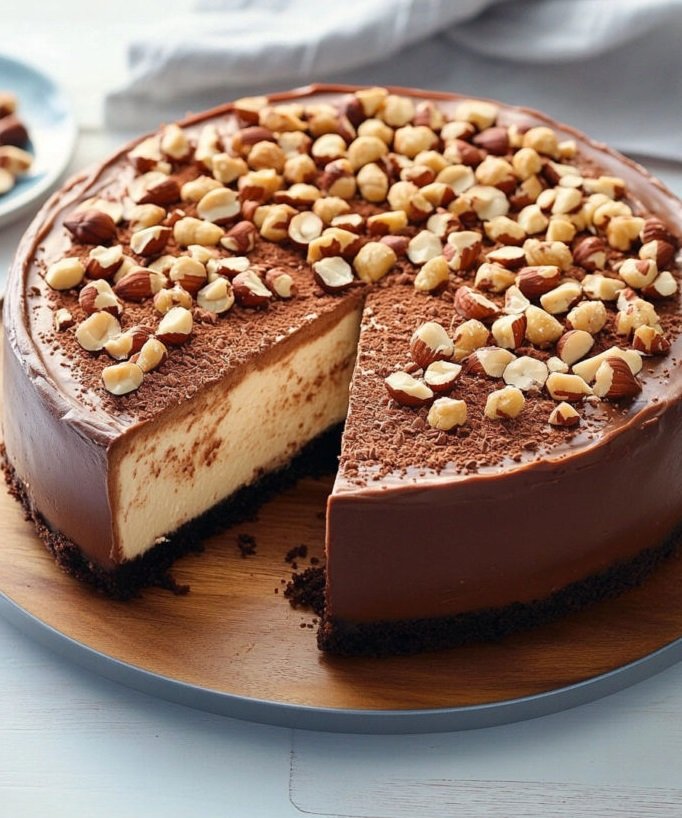
This cheesecake stands out with its smooth chocolate hazelnut filling, decadent chocolate topping, and a crisp chocolate cookie crust for a textural contrast.
Perfect for birthdays, festive dinners, or just when you want to treat yourself, this recipe delivers bakery-quality results without complicated steps.
This guide covers not only every essential detail but also expert-level troubleshooting and tips, so even first-time bakers can achieve a flawless, professional finish.
Ingredients Checklist
Before starting, assemble your ingredients and equipment. Here’s what you need for perfect results, plus helpful alternatives and reasons for each component.
For the Crust:
-
250g chocolate biscuits (Oreo, digestive, or hazelnut cookies also work)
-
60g unsalted butter, melted
For the Cheesecake Filling:
-
750g full-fat cream cheese, softened to room temperature
-
250ml thickened (heavy) cream
-
1 ½ tsp pure vanilla extract
-
220g icing sugar, sifted (can substitute with powdered sugar)
-
350g chocolate hazelnut spread (Nutella or store-brand)
-
180g dark chocolate (70% cocoa), melted and cooled
-
3 large eggs, room temperature (optional, see note for eggless version)
-
Pinch of salt

For the Topping:
-
120g dark chocolate, chopped
-
100ml thickened cream
-
75g roasted hazelnuts, chopped (plus extra for serving)
-
1 tsp neutral oil or butter (for glossy ganache, optional)
Optional Enhancements:
-
1 tsp instant espresso powder (to intensify chocolate flavor)
-
Zest of 1 orange (for a flavor twist)
-
1 tbsp Frangelico, Kahlua, or coffee liqueur (optional)
Essential Equipment:
-
22cm (9-inch) springform pan
-
Food processor or strong zip bag and rolling pin
-
Electric mixer (stand or hand)
-
Heatproof bowls
-
Offset spatula
-
Baking paper
-
Roasting tray (for optional water bath, prevents cracks)

Step-by-Step Instructions
These clear steps help guarantee a smooth process and impressive results.
1. Prepare the Pan and Crust
Line the base of a springform pan with baking paper. In a food processor, pulse chocolate biscuits into fine crumbs. Add melted butter and pulse until the mixture resembles wet sand. Firmly press into the base (and slightly up the sides) of the pan. Chill in the fridge for 20–30 minutes.
2. Make the Filling
Place softened cream cheese in a large bowl. Beat on medium speed until creamy and smooth—at least 2–3 minutes. Scrape down sides as needed. Add sifted icing sugar, vanilla, and salt. Beat until fully combined and fluffy.
In a separate bowl, gently whip cream to soft peaks. Fold whipped cream into the cream cheese mixture until just combined. Add chocolate hazelnut spread and melted chocolate (cooled to lukewarm, not hot). Beat until smooth, scraping the bowl as needed.
If using eggs, add one at a time, mixing until just incorporated. Optional: Mix in espresso powder or liqueur for enhanced depth. Pour filling over the crust and smooth the top. Tap gently to remove air bubbles.
3. Bake or No-Bake Method
Baked Version (for a firmer texture): Preheat oven to 150°C (300°F). Place the pan on a large roasting tray. Pour boiling water into the tray to halfway up the sides of the springform pan.
Bake for 50–60 minutes, until the edges are set but the center jiggles slightly. No-Bake Version (for a silkier, mousse-like finish): Omit eggs. Simply cover and chill the cheesecake for at least 6 hours, preferably overnight, until fully set.
4. Cool and Unmold
Allow baked cheesecake to cool to room temperature, then refrigerate for at least 4 hours or overnight before removing from the pan. Run a thin knife around the edge to loosen before releasing the springform sides.
5. Prepare Ganache Topping
Heat cream until steaming (not boiling). Pour over chopped chocolate and let sit 2 minutes. Add oil or butter if using. Whisk until smooth and glossy. Cool to room temperature, then pour over the chilled cheesecake, spreading to the edges. Scatter chopped hazelnuts on top. Chill 30–60 minutes to set the ganache.
Tips for Perfect Results
Set yourself up for success with these practical tips:
-
Room Temperature Dairy: Softened cream cheese and room-temp eggs prevent lumps and create a silkier filling.
-
Fine Crust: Crush biscuits very finely and press down well to avoid a crumbly base.
-
Avoid Overbeating: Once eggs (if using) are added, mix just until combined to prevent a dense texture.
-
Water Bath: For baked cheesecakes, a water bath keeps the texture ultra-smooth and prevents cracks.
-
Chill Time: Allow the cheesecake to chill overnight for clean slices and full flavor.
-
Troubleshooting Cracks: If cracks do appear, the ganache topping easily hides them.
-
Nut Allergies: Swap hazelnuts for toasted almonds, or omit nuts entirely.
-
Eggless Option: For a no-bake version, leave out eggs and bake, and add 1 extra tablespoon of melted chocolate for structure.
Serving Suggestions
Elevate your dessert with these serving tips and variations:
-
Classic: Serve chilled slices with extra chopped hazelnuts.
-
Fruity Touch: Add fresh raspberries or sliced strawberries on the side.
-
Gourmet: Drizzle with homemade caramel or a sprinkle of sea salt.
-
Seasonal: Top with orange zest or candied orange for a wintery twist.
-
With Coffee: Pair with espresso or a creamy coffee liqueur for a café-style treat.
-
Mini Cheesecakes: Make individual cheesecakes in muffin tins for parties.
Final Thoughts
This Chocolate Hazelnut Cheesecake recipe combines a rich, crunchy base, ultra-creamy filling, and luxurious ganache topping for a dessert that impresses every time.
With detailed instructions, troubleshooting, make-ahead options, and flavor variations, this recipe is designed for both novice bakers and seasoned pros.
Enjoy making—and sharing—a cake that looks as good as it tastes, whether for a special celebration or a well-deserved treat.

Sabrina Khan Tisha is the creative force behind Dessert Diary, a recipe blog celebrating desserts, cakes, cupcakes, muffins, and sweet treats. With a passion for baking, she shares simple, delicious recipes and tips to inspire home bakers everywhere.