Easy Little Layer Chocolate Cake Recipe

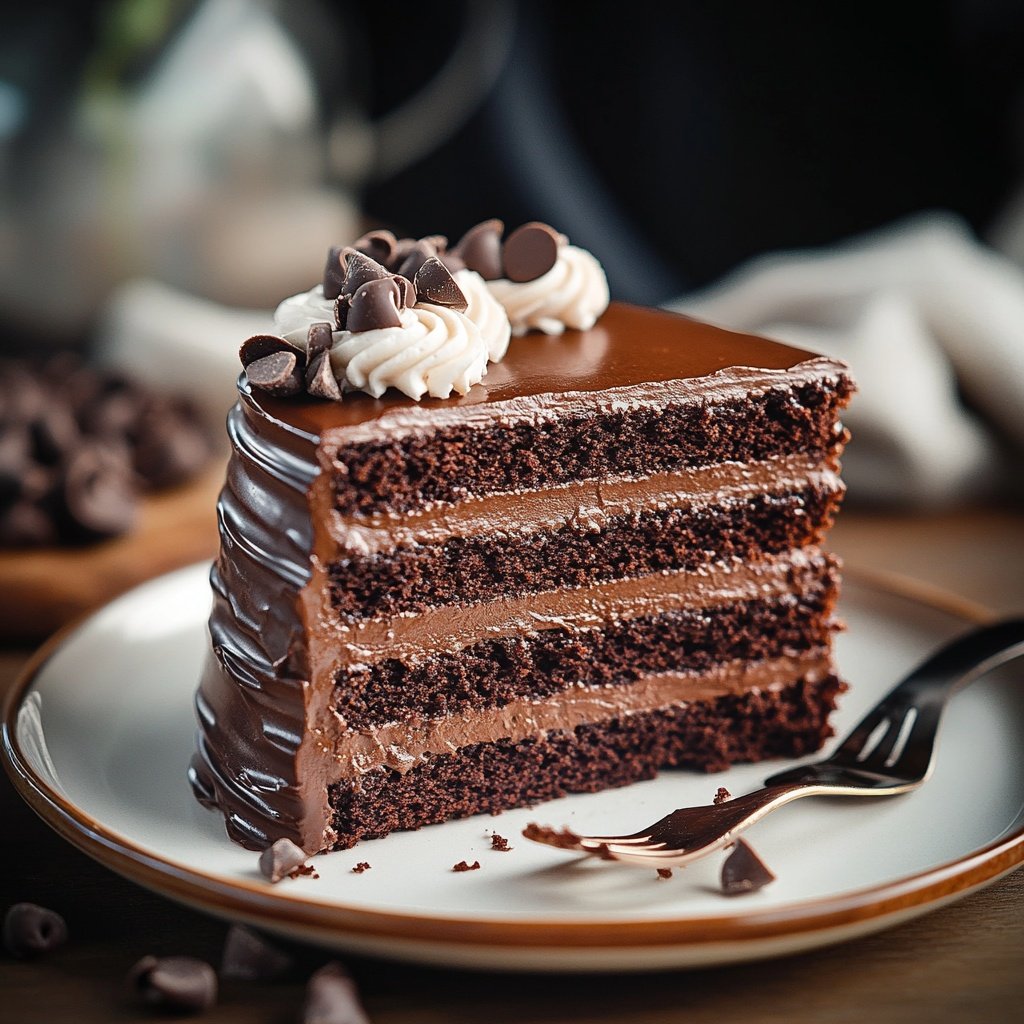
Little Layer Chocolate Cake is a Southern classic known for its dramatic stack of ultra-thin yellow cake layers filled and frosted with rich, homemade chocolate icing.
Unlike a standard layer cake, this recipe delivers ten or more delicate layers, resulting in a stunning cross-section and an ideal balance of buttery cake and glossy chocolate. This cake is a true showpiece for holidays or family celebrations.
While the process may seem ambitious, careful planning and detailed instructions make it accessible for any home baker. Learn the keys to tender layers, glossy icing, and assembly tricks for bakery-quality results every time.
Ingredients Checklist
Starting with the right ingredients ensures both flavor and structure. Here’s a thorough checklist, plus options for dietary needs and flavor customization. Plan to gather all items before starting, as timing is crucial for seamless assembly.
For the Cake Layers:
-
3 cups all-purpose flour, sifted
-
2 teaspoons baking powder
-
1/2 teaspoon baking soda
-
1/2 teaspoon fine salt
-
1 cup unsalted butter, softened to room temperature
-
2 1/4 cups granulated sugar
-
6 large eggs, at room temperature
-
1 tablespoon pure vanilla extract
-
1 1/4 cups whole milk, at room temperature
-
1 tablespoon neutral oil (optional, for extra moisture)
For the Chocolate Icing:
-
2 cups granulated sugar
-
1/2 cup unsweetened cocoa powder (Dutch-process for deeper flavor)
-
1 cup evaporated milk (or whole milk for a slightly lighter consistency)
-
1/2 cup unsalted butter
-
2 teaspoons pure vanilla extract
-
1/2 teaspoon fine salt
Recommended Tools and Equipment:
-
3 to 5 round 8-inch cake pans (or bake in batches, reusing pans)
-
Parchment paper (for easier release)
-
Nonstick baking spray or butter and flour (for greasing pans)
-
Offset spatula for icing
-
Long, thin-bladed knife or cake leveler
-
Electric mixer or stand mixer
-
Large cooling racks
-
Saucepan (for chocolate icing)
-
Instant-read thermometer (for icing accuracy)
-
Cake lifter or wide spatula
Optional Enhancements and Swaps:
-
Espresso powder (1 teaspoon in the icing for extra depth)
-
Substitute 1/2 cup brown sugar in the cake for a slightly caramel note
-
Gluten-free all-purpose flour blend for a GF option
-
Use vegan butter and non-dairy milk for a dairy-free version

Step-by-Step Instructions
This recipe requires careful timing and attention to detail. Read through each step before you begin and measure all ingredients in advance for best results.
Begin by preparing your pans and preheating your oven to 350°F (175°C).
-
Grease 3 to 5 round 8-inch cake pans thoroughly with baking spray or butter, then line the bottoms with parchment rounds. If you have fewer pans, plan to bake in batches and reuse pans.
-
In a medium bowl, sift together flour, baking powder, baking soda, and salt. Set aside.
-
In a large bowl, cream softened butter and sugar together using an electric mixer until light and fluffy, about 4–5 minutes.
-
Add eggs one at a time, beating well after each addition and scraping down the bowl as needed. Mix in vanilla extract.
-
Add flour mixture to the creamed mixture in three parts, alternating with milk, beginning and ending with flour. Mix on low speed after each addition just until incorporated. If using oil for extra moisture, blend it in with the last portion of milk.
-
Divide the batter evenly into 10 to 12 portions (about 1/2 cup batter per layer for ultra-thin layers). Spread each portion thinly into the prepared pans—batter should just cover the bottom of the pan.
-
Bake layers for 10–12 minutes, rotating halfway through baking, until golden and a toothpick comes out clean. Layers bake quickly due to their thinness, so don’t overbake.
-
Immediately turn out cakes onto wire racks to cool, carefully peeling away parchment. Wipe and re-grease pans, then repeat with remaining batter until all layers are baked and cooled.
-
While cakes cool, make the icing: In a heavy-bottomed saucepan, whisk sugar and cocoa powder until evenly blended. Stir in evaporated milk and salt.
-
Place saucepan over medium heat, add butter, and bring mixture to a gentle boil. Cook, stirring constantly, until the icing thickens slightly and registers about 220°F (104°C) on a thermometer, about 7–9 minutes.
-
Remove from heat and stir in vanilla. Let cool slightly—the icing should be thick but pourable, not runny.
-
To assemble, place one cake layer on a cake board or plate. Spread a thin layer of warm chocolate icing evenly over the top, letting it drip down the sides. Repeat with remaining layers, stacking carefully. Pour icing over the top and sides of the assembled cake, smoothing with an offset spatula.
-
Let the cake set at room temperature for at least 1 hour before slicing, or refrigerate briefly for neater slices.

Tips for Perfect Results
Successful Little Layer Chocolate Cake comes down to precision and technique. These tips will help you avoid common mistakes and create a professional result.
-
Use parchment rounds in pans for easy release—thin layers are fragile.
-
Work with room-temperature ingredients for a smooth batter and even layers.
-
Divide batter carefully for consistent layer thickness; use a kitchen scale for accuracy.
-
Don’t overbake—thin layers dry out quickly.
-
Make the icing just before assembling so it pours smoothly but thickens as it cools.
-
If the icing becomes too thick, rewarm gently over low heat while stirring.
-
Assemble the cake while layers are slightly warm for the best absorption of chocolate icing.
-
Press gently but firmly as you stack layers to prevent air pockets.
-
If needed, insert wooden skewers vertically through the cake to prevent sliding during icing.
Serving Suggestions
Creative presentation can turn this classic into a show-stopping centerpiece. Try these serving ideas for extra flair:
-
Garnish each slice with chocolate curls or a dusting of cocoa powder.
-
Serve with a scoop of vanilla or espresso ice cream.
-
Add a dollop of whipped cream and fresh berries for color and brightness.
-
For parties, slice into narrow wedges and serve on a tiered dessert tray.
-
Pair with hot coffee or a dessert wine for a sophisticated finish.
Final Thoughts
Little Layer Chocolate Cake is more than a dessert; it’s a celebration of Southern baking tradition, artistry, and flavor. Each forkful brings together tender yellow cake, glossy chocolate icing, and the satisfaction of mastering a classic.
With these expanded instructions, tested techniques, and creative serving tips, this recipe is approachable for any home baker aiming to impress.
Whether you serve it at family gatherings or special occasions, the Little Layer Chocolate Cake is destined to become a cherished favorite—layer by luscious layer.

Sabrina Khan Tisha is the creative force behind Dessert Diary, a recipe blog celebrating desserts, cakes, cupcakes, muffins, and sweet treats. With a passion for baking, she shares simple, delicious recipes and tips to inspire home bakers everywhere.