No-Bake Chocolate Peanut Butter Mini Cheesecake Recipe

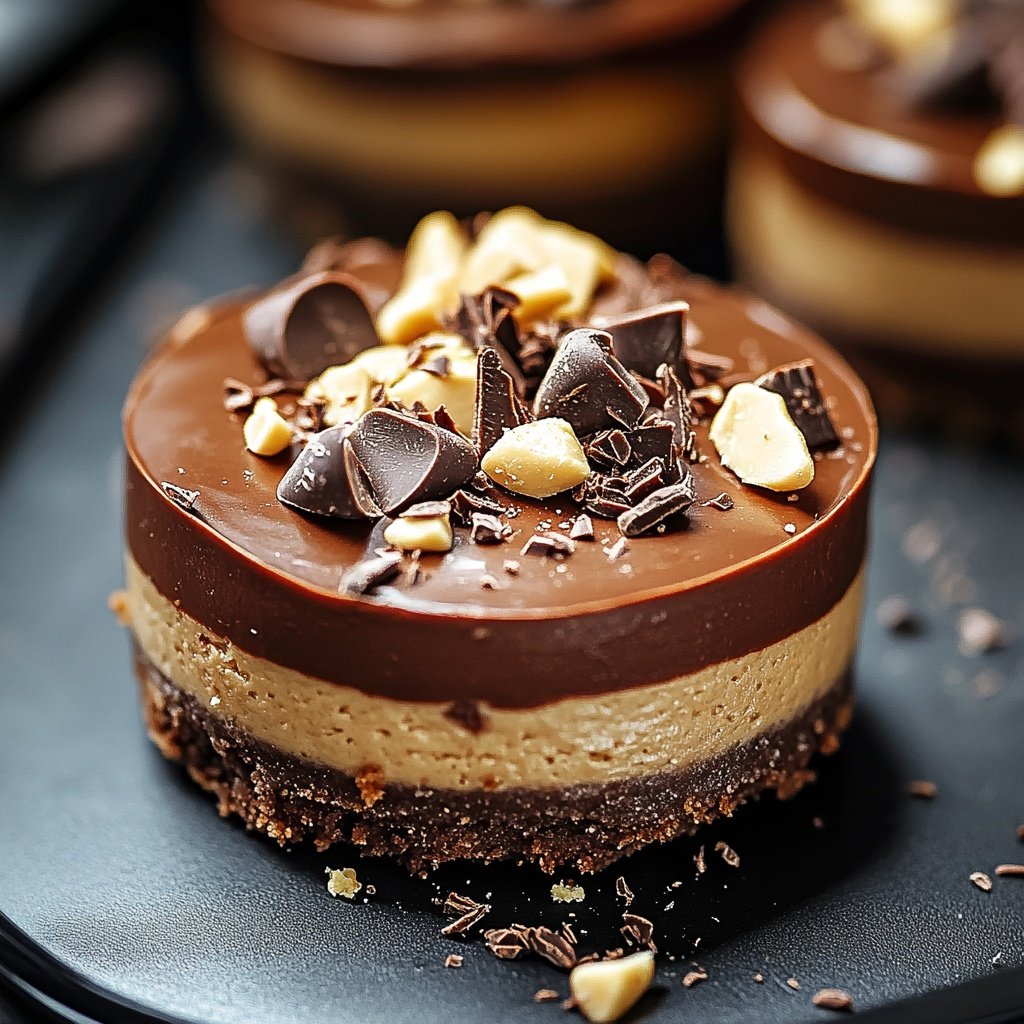
Indulge your cravings for the ultimate dessert duo—peanut butter and chocolate—with these No-Bake Chocolate Peanut Butter Mini Cheesecakes. Featuring a buttery graham cracker base, a silky chocolate cheesecake layer, and a lush peanut butter topping, these bite-sized cheesecakes are the perfect make-ahead treat.
Each one is finished with glossy chocolate ganache, crunchy peanuts, and mini chocolate chips for a dessert that’s rich, creamy, and delightfully fun to eat—no oven or water bath required. Whether you’re hosting a party or looking for a personal indulgence, these mini cheesecakes deliver the classic Reese’s experience in every creamy bite.
Ingredients Checklist
For the Crust
-
1 cup (about 120 g) graham cracker crumbs (or use chocolate cookie crumbs for an even richer base)
-
4 tablespoons (60 g) unsalted butter, melted
-
Pinch of salt (enhances flavor)
For the Chocolate Cheesecake Layer
-
10 ounces (280 g) semi-sweet chocolate, chopped (use high quality for best flavor)
-
1.5 cups (360 ml) heavy cream, at room temperature, divided
-
12 ounces (340 g) full-fat cream cheese, softened
-
1/2 cup (60 g) powdered sugar
-
1/2 teaspoon vanilla extract
For the Peanut Butter Cheesecake Layer
-
4 ounces (115 g) full-fat cream cheese, softened
-
1/2 cup (60 g) powdered sugar
-
2/3 cup (160 g) creamy peanut butter (use a processed, “no-stir” style for stability)
-
2/3 cup (160 ml) heavy cream
-
1/2 teaspoon vanilla extract
For the Chocolate Ganache
-
6 ounces (170 g) semi-sweet chocolate, chopped
-
6 tablespoons (90 ml) heavy cream, at room temperature
-
1/4 teaspoon neutral oil (canola or coconut; ensures a shiny, soft ganache)
For Topping
-
Mini chocolate chips
-
Chopped roasted peanuts
-
Peanut butter cups or chocolate curls (optional)
Equipment Needed
-
12-cup standard muffin tin (or mini cheesecake pan)
-
Large paper or foil muffin liners (for easy release and best presentation)
-
Mixing bowls (for crust and fillings)
-
Microwave-safe bowls (for melting chocolate)
-
Electric hand mixer or stand mixer (for smooth, fluffy filling)
-
Rubber spatula
-
Small offset spatula or spoon (for spreading layers)
-
Piping bag or zip-top bag (optional, for neater layers)
-
Refrigerator and freezer space
Step-by-Step Instructions
1. Prepare the Crust
-
Line each cup of your muffin tin with a paper or foil liner.
-
In a bowl, combine graham cracker crumbs, melted butter, and a pinch of salt until evenly moistened.
-
Divide the crumb mixture evenly among the liners (about 1 heaping tablespoon each). Press firmly with the bottom of a shot glass or spoon to form a tight, even crust.
-
Chill the pan in the refrigerator while you prepare the cheesecake layers.
2. Make the Chocolate Cheesecake Layer
-
In a microwave-safe bowl, melt 10 oz of chopped chocolate with 1/2 cup heavy cream in 20-second bursts, stirring until smooth. Let cool to room temperature.
-
In a large mixing bowl, beat 12 oz cream cheese and 1/2 cup powdered sugar until creamy and lump-free.
-
Mix in 1/2 teaspoon vanilla extract.
-
Pour in the cooled chocolate mixture and blend until smooth.
-
In a separate bowl, whip the remaining 1 cup heavy cream to stiff peaks. Gently fold it into the chocolate mixture in two batches until just combined.
-
Spoon or pipe the chocolate cheesecake mixture over the crusts, filling each liner halfway. Smooth the tops.
-
Freeze for 20 minutes to set the chocolate layer slightly (this helps keep the peanut butter layer distinct).
3. Make the Peanut Butter Cheesecake Layer
-
In a medium bowl, beat 4 oz cream cheese and 1/2 cup powdered sugar until smooth.
-
Add peanut butter and vanilla extract; mix until well incorporated.
-
In a separate bowl, whip 2/3 cup heavy cream to stiff peaks.
-
Gently fold the whipped cream into the peanut butter mixture until light and fluffy.
-
Spoon or pipe this layer over the chocolate cheesecake, filling the cups almost to the top. Smooth the tops.
-
Refrigerate the pan for at least 4 hours, or overnight, for the mini cheesecakes to fully set.
4. Prepare the Chocolate Ganache
-
Place 6 oz chopped chocolate in a bowl.
-
Heat 6 tbsp heavy cream until just steaming; pour over the chocolate.
-
Let sit for 2 minutes, then stir until smooth. Add 1/4 tsp oil and mix for extra shine and softness.
-
Cool to room temperature, then spread or drizzle over each mini cheesecake.
5. Garnish and Serve
-
Top each cheesecake with mini chocolate chips, chopped peanuts, or a wedge of peanut butter cup.
-
For an extra professional look, pipe a swirl of whipped cream or a peanut butter drizzle over the ganache.
-
Chill until ready to serve. Gently peel off the liners before plating.

Tips for Perfect Results
-
Use full-fat, brick-style cream cheese for best texture; avoid whipped or spreadable varieties.
-
Make sure all dairy is at room temperature for a smooth, lump-free filling.
-
To avoid runny layers, whip the cream to stiff peaks and fold gently.
-
Freeze each layer briefly before adding the next for neat, defined layers.
-
For a gluten-free version, use gluten-free cookies in the crust.
-
For a nut-free option, replace peanut butter with sunflower seed butter and omit peanut garnish.
Serving Suggestions
-
Serve straight from the fridge for the creamiest texture and best definition.
-
Add a scoop of vanilla ice cream and a sprinkle of chopped chocolate for a plated dessert.
-
Create a mini dessert bar with a tray of assorted toppings: crushed pretzels, toffee bits, or fresh raspberries.
Final Thoughts
No-Bake Chocolate Peanut Butter Mini Cheesecakes are a guaranteed crowd-pleaser—rich, creamy, and layered with the classic flavors everyone loves. Easy to prep ahead, they’re perfect for parties, celebrations, or anytime you crave an indulgent, no-oven treat. With endless options for toppings, customizations, and storage, this recipe is destined to become a go-to favorite. Store leftovers in an airtight container in the fridge for up to 5 days or freeze for up to 2 months—if they last that long!

Sabrina Khan Tisha is the creative force behind Dessert Diary, a recipe blog celebrating desserts, cakes, cupcakes, muffins, and sweet treats. With a passion for baking, she shares simple, delicious recipes and tips to inspire home bakers everywhere.