Pumpkin Pie Recipe

Pumpkin pie is an iconic dessert that captures the essence of autumn with its creamy, spiced filling and buttery crust. Whether you’re preparing for a festive Thanksgiving feast or simply craving the nostalgic flavors of fall, a homemade pumpkin pie never disappoints.
This recipe walks you through creating the perfect pie from scratch, providing detailed instructions, expert tips, and essential troubleshooting to ensure flawless results every time.
From mastering a tender, flaky crust to balancing spices in the silky filling, this guide ensures your pumpkin pie becomes a standout favorite, easily adaptable for any occasion or dietary need.
Ingredients Checklist
Gathering the right ingredients before you begin sets you up for pie-baking success. Here’s everything you need for a truly classic pumpkin pie, plus optional enhancements for personalizing your dessert.
For the Pie Crust:
-
1 1/4 cups (155g) all-purpose flour
-
1/4 teaspoon fine sea salt
-
1/2 cup (113g) cold unsalted butter, diced
-
3–5 tablespoons ice water
For the Pumpkin Filling:
-
1 (15 oz/425g) can pure pumpkin puree (not pumpkin pie filling)
-
1 (14 oz/396g) can sweetened condensed milk
-
2 large eggs, at room temperature
-
1 teaspoon ground cinnamon
-
1/2 teaspoon ground ginger
-
1/2 teaspoon ground nutmeg
-
1/4 teaspoon ground allspice
-
1/8 teaspoon ground cloves (optional)
-
1/2 teaspoon fine sea salt
-
1 teaspoon pure vanilla extract (optional, enhances depth of flavor)
Optional Variations and Add-Ins:
-
2 tablespoons maple syrup or dark brown sugar for deeper sweetness
-
1/2 teaspoon orange zest for a citrusy lift
-
1/4 teaspoon ground black pepper for a subtle spice complexity
Toppings and Garnishes:
-
Fresh whipped cream
-
Vanilla ice cream
-
Caramel sauce
-
Toasted pecans, candied ginger, or pumpkin seeds
Special Equipment:
-
9-inch (23cm) pie dish
-
Pastry blender or two forks
-
Rolling pin
-
Pie weights or dried beans
-
Mixing bowls
-
Wire rack for cooling

Step-by-Step Instructions
A little preparation and attention to detail make all the difference in creating a perfect pumpkin pie. Here’s a clear, step-by-step guide to each stage:
-
Prepare the Crust: In a large bowl, combine flour and salt. Cut in the cold butter using a pastry blender or fingertips until the mixture forms pea-sized crumbs. Add ice water, one tablespoon at a time, gently mixing until dough just holds together. Form the dough into a disk, wrap in plastic, and chill for at least 1 hour (up to 2 days).
-
Roll Out the Dough: On a lightly floured surface, roll the chilled dough into a 12-inch circle. Gently transfer to a 9-inch pie dish, fit it in without stretching, and trim the edges, leaving a 1-inch overhang. Tuck the excess dough under and crimp the edges decoratively. Dock the base with a fork and chill the crust for another 30 minutes to minimize shrinkage.
-
Blind Bake the Crust (Optional but Recommended): Preheat oven to 400°F (200°C). Line the crust with parchment and fill with pie weights or beans. Bake for 15 minutes, remove weights and parchment, then bake 5–8 more minutes until just starting to turn golden. Cool slightly before filling.
-
Mix the Pumpkin Filling: In a large bowl, whisk together pumpkin puree, sweetened condensed milk, eggs, spices, salt, and vanilla (if using) until completely smooth. Ensure eggs are fully incorporated for a uniform, silky filling.
-
Fill and Bake: Reduce oven temperature to 350°F (175°C). Pour the filling into the prepared crust, smoothing the top. Bake for 40–50 minutes, rotating halfway, until the edges are set and the center jiggles slightly when gently shaken. If the crust browns too fast, shield with foil or a pie crust shield.
-
Cool and Set: Let the pie cool on a wire rack for at least 2 hours. The filling will firm up as it cools. For the cleanest slices, chill in the refrigerator for 2–4 hours or overnight.
-
Slice and Serve: Use a sharp, thin knife dipped in hot water for clean cuts. Wipe the knife between slices for neat presentation.
Tips for Perfect Results
Even small details can elevate your pumpkin pie from good to exceptional. Follow these expert tips to avoid common pitfalls and achieve bakery-quality results:
-
Keep ingredients cold: Cold butter and minimal handling are essential for a flaky, tender crust.
-
Do not overwork the dough: Stop mixing as soon as the dough comes together to prevent a tough crust.
-
Blind bake for crispiness: Blind baking helps prevent a soggy bottom, especially with wet fillings.
-
Room temperature eggs: Room temp eggs blend more smoothly, preventing curdling and ensuring a creamy texture.
-
Check for doneness properly: The pie is done when the edges are set and the center quivers slightly. Overbaking can cause cracks or a rubbery texture.
-
Cool completely before slicing: The filling needs time to finish setting—slicing too soon will cause it to ooze.
-
Prevent burning: If the crust starts browning too quickly, cover the edges with foil partway through baking.
-
Make ahead: Pumpkin pie tastes best after chilling, and can be made up to two days in advance.
-
Allergy adaptations: For gluten-free, use a trusted gluten-free flour blend in the crust. For dairy-free, swap condensed coconut milk for regular condensed milk and vegan butter for the crust.
Serving Suggestions
A few thoughtful touches make your homemade pumpkin pie irresistible and ready for any gathering. Try these serving ideas to enhance every slice:
-
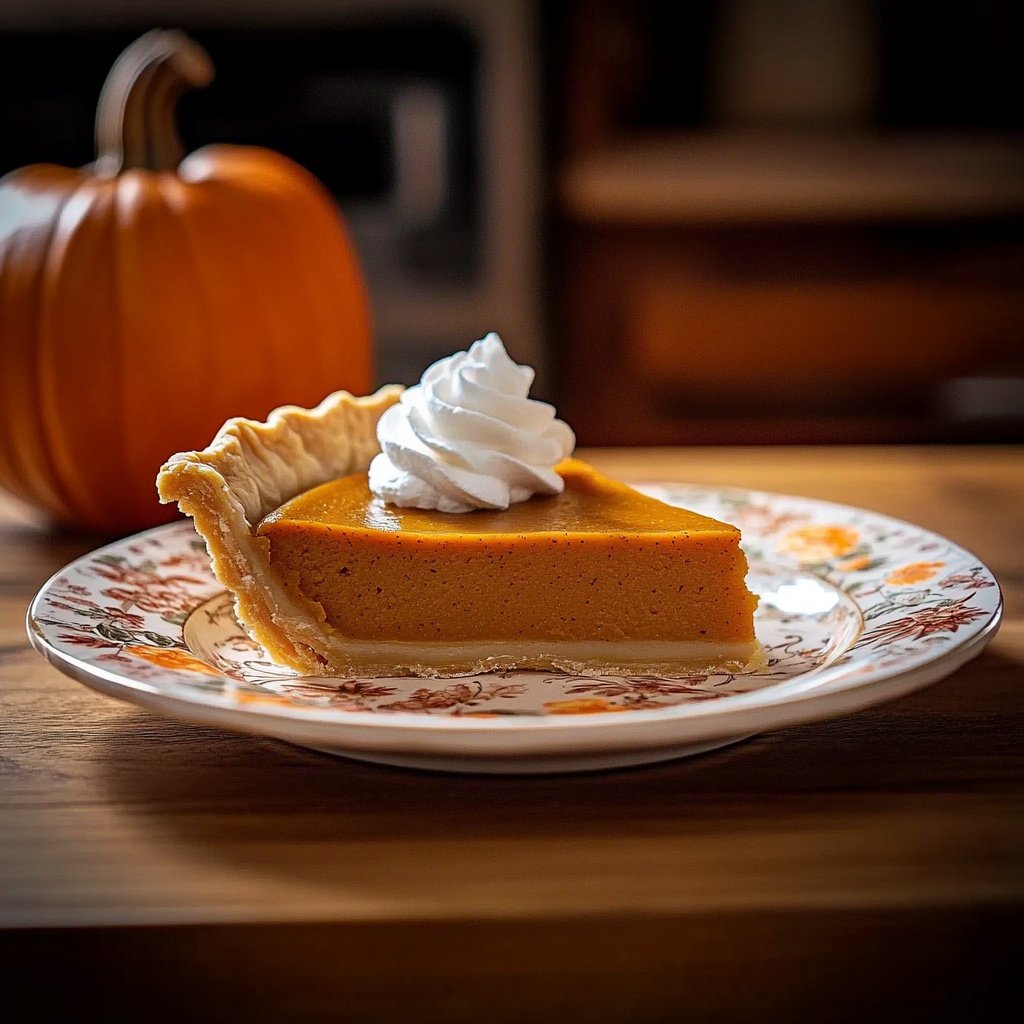
Serve slices chilled or at room temperature, topped with clouds of freshly whipped cream.
-
Add a sprinkle of cinnamon, nutmeg, or pumpkin pie spice over whipped cream for a festive look.
-
For a modern twist, drizzle with warm caramel or maple syrup.
-
Offer toasted pecans, candied ginger, or roasted pumpkin seeds for texture and extra flavor.
-
For dinner parties, pair with cinnamon ice cream or lightly sweetened Greek yogurt.
-
Garnish with orange zest or edible flowers for special occasions.
-
If serving buffet-style, pre-slice and arrange on a platter with parchment paper between layers for easy grabbing.
Final Thoughts
Homemade pumpkin pie is more than just a dessert—it’s a symbol of the season and a time-honored tradition for families and friends. Mastering the details, from a flaky crust to a perfectly set filling, transforms this classic into a showstopper.
This recipe offers plenty of room for creativity, whether you’re tweaking the spices, adding fun toppings, or making it gluten- or dairy-free.
Don’t rush the process; patience is rewarded with a pie that slices beautifully and tastes even better the next day. Bake this pie for your next celebration, and you’ll find it’s destined to become a beloved staple on your autumn table.

Sabrina Khan Tisha is the creative force behind Dessert Diary, a recipe blog celebrating desserts, cakes, cupcakes, muffins, and sweet treats. With a passion for baking, she shares simple, delicious recipes and tips to inspire home bakers everywhere.